How To Plan An Interior Car Cleaning Routine For Fabric Seats
A practical step-by-step guide to how to plan an interior car-cleaning routine for fabric seats, including preparation, instructions, common issues, tips, and next steps.
How To Plan An Interior Car Cleaning Routine For Fabric Seats
Learning how to plan an interior car-cleaning routine for fabric seats helps you keep your vehicle fresh and extend the life of the upholstery. A consistent schedule prevents dirt from grinding into the fibers, reduces odors, and makes each cleaning session easier. This guide walks you through the essential steps, from gathering supplies to advanced stain removal, so you can maintain your seats without overwhelming effort. By following the routine, you will create a habit that protects your car's interior and enhances your driving comfort.
Fast Answer
- Start with a weekly vacuum using a brush attachment to lift loose dirt and crumbs from the fabric surface and crevices.
- Every month, do a deeper clean: vacuum thoroughly, apply a fabric-safe cleaner, scrub gently with a soft brush, and blot dry with a clean cloth.
Before You Start
- Assemble basic supplies: a vacuum with a brush attachment, soft-bristled brush, microfiber towels, and a fabric cleaner suitable for automotive interiors.
- Park your car in a shaded area or garage so the seats are cool to the touch, which prevents cleaners from drying too quickly.
- Clear items from seats and floor, and use a small brush to dislodge debris from seams and crevices before vacuuming.
- Check the fabric care label on your seats to see any specific cleaning recommendations from the manufacturer.
Step-by-Step Instructions
Gather Your Cleaning Supplies
Before touching your seats, gather everything you need: a vacuum with an upholstery brush, a soft-bristled brush (an old toothbrush works for crevices), a few clean microfiber towels, a spray bottle with plain water, and a fabric cleaner designed for car interiors. If you do not have a commercial cleaner, a mild solution of dish soap and water can work, but never use bleach or harsh solvents. Lay all supplies within reach so you do not have to pause mid-task. Having the right tools prevents you from using a harsher method than necessary. Check that your vacuum has good suction and that your brushes are clean to avoid scratching the fabric. Preparation ensures you can work without interruptions, which makes the routine faster and more effective.
Vacuum the Seats First
Use the vacuum with the brush attachment to go over the entire seat surface, including the front and back, the headrest, and especially the crevices where crumbs and grit hide. Work in overlapping strokes, first in one direction, then the other, to loosen ground-in dirt. Pay close attention to the seams and the gap between the seat cushion and backrest because these areas trap debris. If your vacuum has a crevice tool, use it for tight spaces. This initial vacuuming removes loose particles that would otherwise turn into a paste when you add cleaner. It also makes the cleaning step more effective, as you are not trying to dissolve dry dirt. Check that the suction is picking up all visible grit by running a clean hand over the fabric after.
Pre-Treat Visible Stains
After vacuuming, inspect the seats for any spots or stains such as coffee, juice, or dirt marks. Spray a small amount of your fabric cleaner directly onto a microfiber towel first, rather than onto the seat, to avoid overwetting. Gently blot the stain from the outer edges inward, using a fresh section of the towel as you go. Do not rub, because rubbing can push the stain deeper into the fibers. For stubborn stains, let the cleaner sit for a few minutes as directed on the product label, but do not let it dry completely. Pre-treating these spots before the full cleaning ensures they get extra attention and are more likely to lift out completely. Check the area by blotting with a dry towel to see if the stain transfers.
Clean the Fabric with a Brush
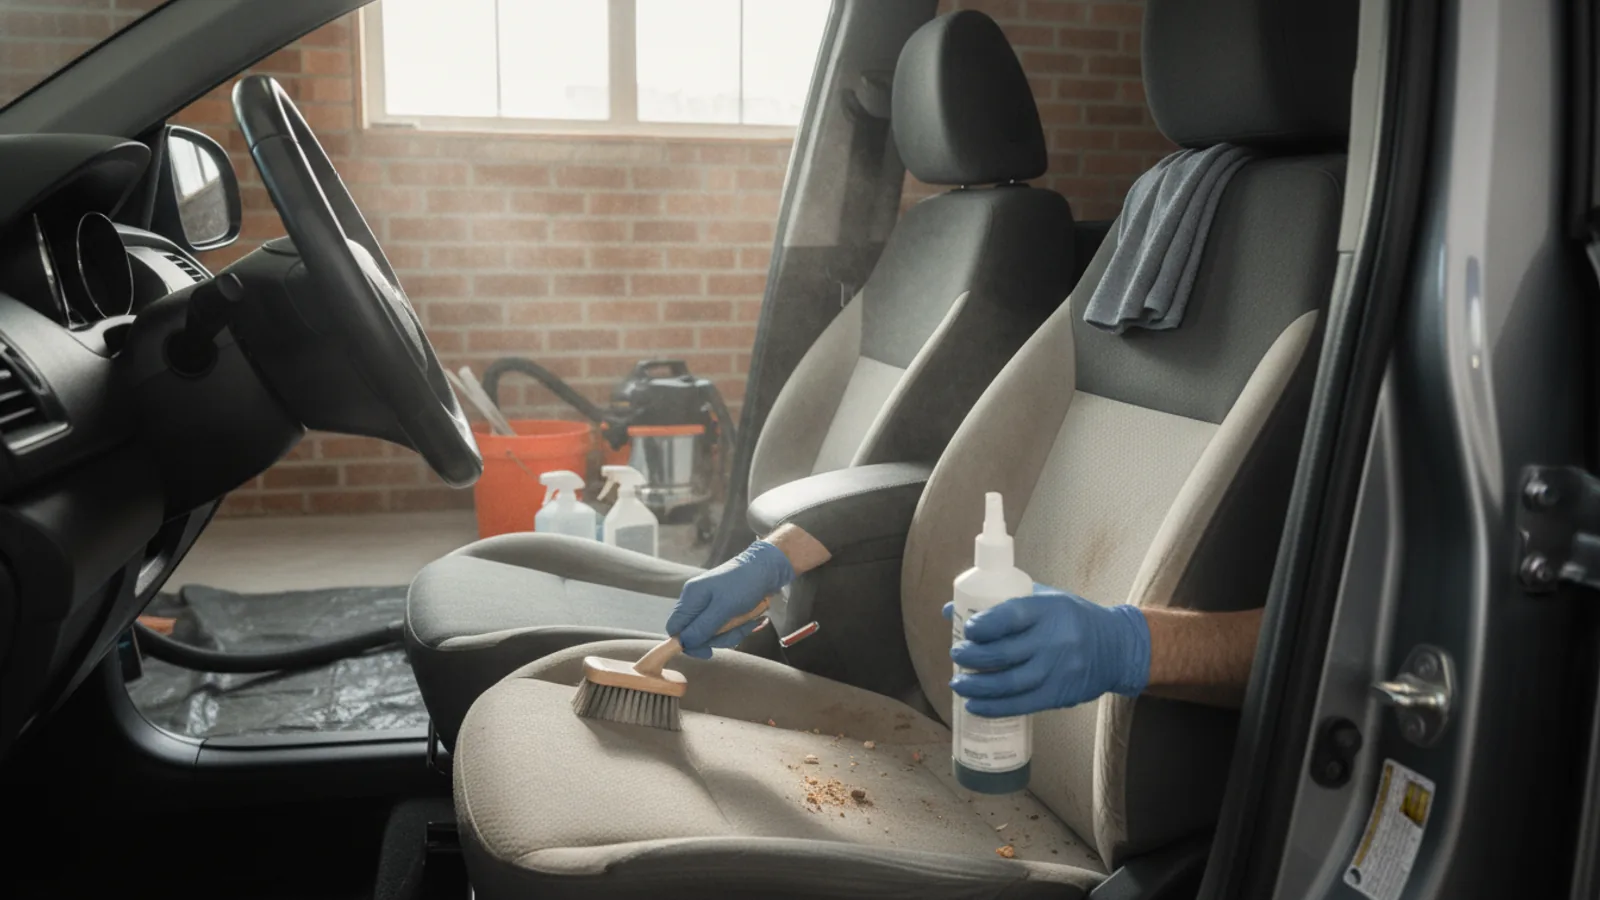
Dampen the entire seat surface lightly with water using a spray bottle, then apply a generous but controlled amount of fabric cleaner to a small section at a time. Using a soft-bristled brush, work the cleaner into the fabric in circular motions, concentrating on high-contact areas like the seat bottom and the lower backrest. This agitation breaks up embedded dirt and lifts it to the surface. Work slowly, covering about one seat panel at a time so the cleaner does not dry before you can rinse. After brushing, use a damp microfiber towel to wipe away the loosened dirt, then move on to the next section. This method avoids over-saturation and ensures thorough cleaning. Check the towel periodically; it will show the dirt being removed, which indicates progress.
Rinse and Extract Excess Moisture
After you have cleaned the whole seat, it is crucial to remove the soapy residue, which can attract new dirt if left behind. Fill a clean spray bottle with plain water and lightly mist the seat to dampen it, then blot with a dry microfiber towel, pressing firmly to absorb the moisture and the dissolved soap. Repeat this rinse-and-blot process until the towel comes up clean without any soapy residue. If you have a wet/dry vacuum, you can use it to extract more water, but blotting is sufficient for light cleaning. Let the seat air-dry with the windows rolled down or the door open, but avoid direct sunlight. Proper rinsing prevents sticky residue and keeps the fabric feeling fresh. Check that no soap bubbles remain by pressing a dry towel onto the fabric.
Protect and Finish the Fabric
Once the fabric is completely dry, it is wise to apply a fabric protector if your car seats did not come with one. This step is optional but can help repel spills and make future cleaning easier. Follow the product instructions for application, usually spraying a light mist evenly over the seats and letting it cure for the recommended time. This protective coating bonds to the fibers and creates a barrier against liquid penetration. After applying the protector, give the seats a final vacuum with the brush attachment to fluff the fibers and remove any remaining dust. This finishing step leaves your seats looking refreshed. Check that the seats feel dry to the touch and have no lingering laundry or chemical smell.
Quick Reference
| Situation | Action | Why it helps |
|---|---|---|
| After a road trip with snacks and drinks, the seats have crumbs and sticky spots. | Vacuum all surfaces and crevices with the brush attachment, then use a damp microfiber towel with a few drops of mild dish soap to gently spot-clean sticky areas, and blot dry with a clean towel. | This quick action removes food particles and sugar residue before they attract bugs or cause stains to set, keeping the fabric fresher. |
| You notice a coffee or juice stain that has dried onto the fabric. | Mix a small amount of dish soap with warm water, dampen a microfiber towel, and blot the stain in circular motions from the outside in, then rinse with a damp cloth and blot dry. | Blotting lifts the stain without spreading it, and using mild soap breaks down the residue without damaging fabric fibers. |
| The seats have a musty or lingering odor even after cleaning. | Sprinkle a generous layer of baking soda over the entire seat surface, let it sit for 15-30 minutes to absorb odors, then vacuum thoroughly using the brush attachment. | Baking soda neutralizes odors by absorbing moisture and volatile compounds, and vacuuming removes the powder along with the trapped smells. |
Common Issues
- Water spots or rings appear after cleaning.: Rewet the entire seat panel lightly with water, then blot it dry with a clean towel, working from the edges to the center, and allow it to air dry fully. This evens out the moisture distribution and eliminates the ring.
- The fabric looks faded or worn after repeated cleaning.: Use a gentle cleaning solution and always test on a hidden area first. Reduce the frequency of deep cleaning and instead rely on regular vacuuming and spot cleaning. Consider applying a fabric protector to shield the fibers from UV damage.
- Stains keep recurring in the same spot.: Thoroughly clean the area with a fabric cleaner and rinse well to remove all residue, then apply a fabric protector to create a barrier against future spills. If the stain persists, it may need professional extraction, but a deep home cleaning with a steam cleaner can also help.
Advanced Tips
- Use a steam cleaner with an upholstery attachment once a year to deep-clean fabric seats, as the high temperature helps break down embedded grime without harsh chemicals.
- Park with your windows slightly open on hot days to let the interior air out, which reduces moisture that can lead to mold or mildew in the padding.
- Keep a small portable vacuum in the trunk for quick clean-ups after grocery runs or beach trips, so you can address spills and crumbs immediately before they set.
Final Checklist
- Vacuum every seat surface, seams, and crevices with the brush attachment to remove loose dirt.
- Spot-clean any visible stains using a mild cleaner and blotting technique.
- Clean the fabric with a soft-bristled brush and rinse thoroughly with water to remove soap residue.
- Allow seats to air dry completely before using the car, and apply a fabric protector for ongoing defense.
FAQ
How often should I deep-clean my fabric car seats?
Aim for a deep cleaning every three to six months, depending on how often you use your car and whether you have kids or pets. In between, vacuum weekly and spot-clean any spills immediately to prevent stains and odors from building up.
Can I use household cleaners like laundry detergent on car seats?
It's best to avoid household detergents because they can contain dyes, brighteners, or enzymes that may discolor or damage automotive fabric. Stick to a mild dish soap diluted in water or a dedicated fabric cleaner specifically designed for car interiors.
Will water stains on fabric seats go away?
Yes, they often fade once the fabric fully dries. If you notice rings, lightly mist the entire seat with water to re-wet it evenly, then blot with a towel and allow it to dry. Avoid applying heat directly, as that can set the stain.